
How to Brew Specialty Coffee at Home: 2026 Guide
Table of Contents
- What You'll Need Before You Brew Specialty Coffee at Home
- Coffee Grind Size Chart: Match Your Method
- Coffee Brewing Ratios: The Numbers That Matter
- Water Temperature for Specialty Coffee
- Step-by-Step: Brewing Specialty Coffee at Home
- Common Brewing Mistakes and How to Fix Them
- Budget-Friendly Specialty Setups and Sensory Training
- Frequently Asked Questions
Last Updated: September 17, 2026
What You'll Need Before You Brew Specialty Coffee at Home
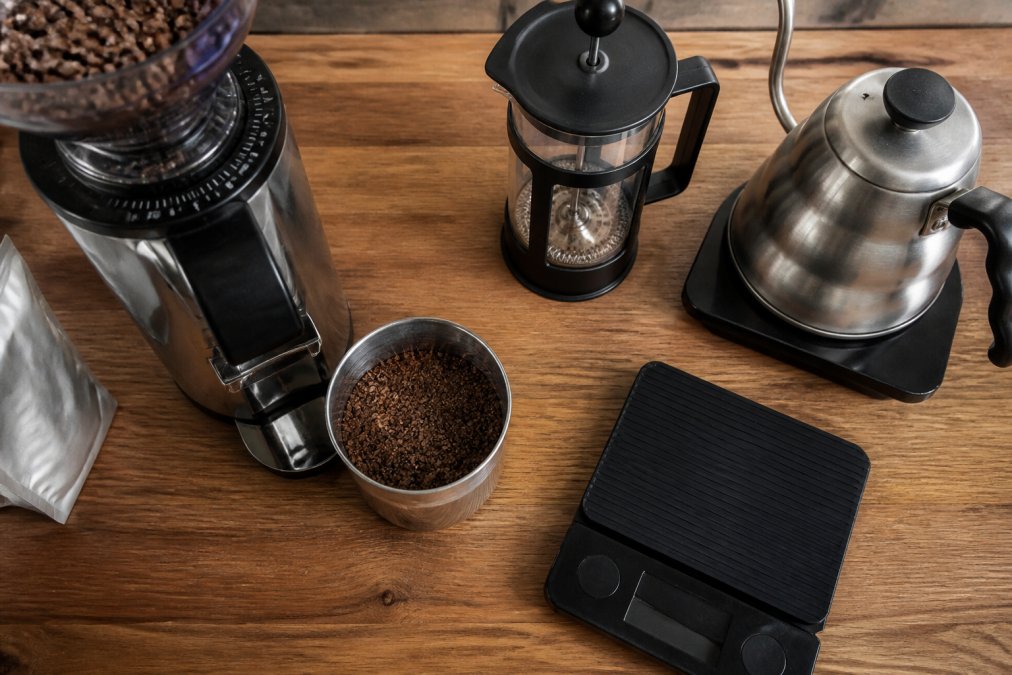
Learning how to brew specialty coffee at home starts with a short list of gear, not a big budget. At Reading Coffee, we've watched home brewers chase expensive equipment when the real gains come from three things: a burr grinder, a scale, and fresh beans.
Here's the core kit:
- Burr grinder (hand or electric) for consistent particle size
- Digital scale accurate to 0.1 g
- Gooseneck kettle for controlled pouring
- Brewer of choice: pour-over cone, French press, AeroPress, or auto-drip
- Filter paper matched to your brewer
- Fresh beans roasted within the last few weeks
A common mistake is buying a cheap blade grinder to save money. Blade grinders chop unevenly, which causes both over-extraction and under-extraction in the same cup. Fix the grinder first, everything else improves.
Coffee Grind Size Chart: Match Your Method
Grind size decides how fast water moves through the coffee, and therefore how much flavor ends up in your cup. Match the grind to your brewer, not the other way around.
Brewer |
Grind Size |
Texture Reference |
Typical Brew Time |
|---|---|---|---|
French press |
Coarse |
Sea salt |
4-5 minutes |
Auto-drip |
Medium |
Table salt |
5-6 minutes |
Pour-over |
Medium-fine |
Fine sand |
2.5-3.5 minutes |
Fine |
Powdered sugar |
1.5-2.5 minutes |
|
Moka pot |
Fine |
Powdered sugar |
3-5 minutes |
Why Grind Size Decides Extraction
Water pulls soluble compounds out of coffee grounds, and smaller particles give up those compounds faster because more surface area is exposed. Too fine, and you get over-extraction: bitter, dry, harsh. Too coarse, and you get under-extraction: sour, thin, weak.
The practical rule: change one variable at a time. If your cup tastes sour and weak, grind finer.
Coffee Brewing Ratios: The Numbers That Matter
Coffee brewing ratios define how much coffee you use per unit of water, and they're the fastest lever you can pull to change strength. The standard starting point is 1:16, one gram of coffee to sixteen grams of water. From there, adjust to taste.
A few reliable reference points:
- 1:15 for a fuller, stronger cup
- 1:16 as the balanced default
- 1:17 for a lighter, tea-like result
Water Temperature for Specialty Coffee
Water temperature for specialty coffee should sit between 195°F and 205°F (91-96°C). Below that range, extraction stalls and the cup tastes flat. Above it, you scorch the grounds and pull out harsh, bitter compounds.
Water Quality: The Variable Most Brewers Ignore
Coffee is roughly 98% water, so the water itself shapes the final cup. The Specialty Coffee Association's water standards outline target ranges for minerals and alkalinity that support clean extraction.
Two practical fixes:
- Filter your tap water to strip chlorine and odors
- Avoid distilled water on its own, since it lacks the minerals that help carry flavor
Step-by-Step: Brewing Specialty Coffee at Home
Here's the pour-over method, the most forgiving way to learn the process. Total time: about 5 minutes. You'll need a cone dripper, filter paper, a burr grinder, a scale, and a gooseneck kettle.
- Heat water to 200°F and rinse the filter with hot water, then discard the rinse.
- Weigh 22 g of beans and grind to medium-fine.
- Add grounds to the filter and tare your scale to zero.
- Bloom: pour 60 g of water, wait 30-45 seconds. This releases trapped carbon dioxide.
- Pour in circles, adding water in stages up to 350 g total.
- Let it drain fully, aiming for a total brew time of 2.5-3.5 minutes.
- Swirl the carafe and taste. Adjust grind next time if needed.
Common Brewing Mistakes and How to Fix Them
Most bad home coffee traces back to a handful of fixable errors. The table below maps each problem to its cause and correction.
Problem |
Likely Cause |
Fix |
|---|---|---|
Sour, weak cup |
Under-extraction |
Grind finer or raise water temp |
Bitter, harsh cup |
Over-extraction |
Grind coarser or shorten brew time |
Uneven, watery taste |
Channeling |
Level the bed, pour more evenly |
Stale, flat flavor |
Old beans |
Buy fresh, store airtight |
Inconsistent cups |
No scale |
Weigh coffee and water every time |
Budget-Friendly Specialty Setups and Sensory Training
You don't need a commercial setup to brew specialty coffee at home well, and you don't need an expensive palate to taste the difference. This section covers both: a tiered gear path that respects a tight budget, and a structured way to train your senses so you can actually tell what your changes are doing.
Specialty Coffee on a Tight Budget
Most guides assume a $500+ setup. You can get genuinely good cups for far less by spending where it matters and saving where it doesn't.
- Hand burr grinder. A steel-burr hand grinder is the single highest-value purchase. It delivers consistent particle size for a fraction of an electric burr grinder's cost. This is non-negotiable, a blade grinder will cap your ceiling no matter what else you buy.
- Digital scale accurate to 0.1 g. Removes all guesswork from ratio and pour. Cheap and transformative.
- A plastic pour-over cone. Plastic is inexpensive, durable, and holds heat well. It brews as well as ceramic or glass for a fraction of the price.
- Filter paper matched to the cone.
- Fresh beans with a roast date. The cheapest upgrade to flavor is simply fresher coffee.
Tier 2, Worth adding later:
- Gooseneck kettle. Improves pour control. A stovetop version costs far less than a variable-temperature electric one; you can hit temperature by boiling and resting.
- AeroPress or French press. Adds variety and forgiveness. The AeroPress in particular is hard to brew badly.
Sensory Training: The Skill Nobody Teaches
Sensory training is the skill most brewers never develop, and it's free. The Coffee Quality Institute's cupping protocols describe how professionals taste systematically. You can adapt the same approach at home.
The three attributes to separate:
- Acidity, not sourness, but the bright, lively, fruit-like sensation. Think of the difference between a green apple and a lemon. High-quality acidity reads as pleasant and clean; under-extraction reads as sharp and unpleasant.
- Body, the tactile weight on your tongue. Compare skim milk (light) to whole milk (medium) to cream (heavy). Body comes largely from oils and dissolved solids.
- Sweetness, the round, caramel-or-fruit impression that appears when extraction is dialed in. It's the first thing to vanish when a cup is over- or under-extracted.
How to actually practice:
- Slurp. Pull the coffee across your whole palate with air. This spreads it over more taste receptors and volatilizes aromatics.
- Taste one attribute at a time. Don't try to describe everything at once. Ask only: how acidic is this? Then only: how heavy? Then only: how sweet?
- Use references. Keep a green apple, a lemon, and a piece of dark chocolate nearby. Compare the coffee's acidity to the apple and lemon; compare its bitterness to the chocolate. Calibration against real objects is what sharpens perception.
- Taste the extremes on purpose. Deliberately brew one cup under-extracted (coarse grind) and one over-extracted (fine grind). Tasting the failure modes side by side teaches you to recognize them instantly.
- Log it. A simple tasting log turns scattered impressions into a pattern.
- Note the roast level and origin
- Record grind, ratio, and water temp
- Write three tasting notes (acidity, body, sweetness)
- Rate the cup and note one change for next time
Frequently Asked Questions
What is the ideal coffee-to-water ratio for specialty beans?
A 1:15 to 1:17 ratio works for most methods: 15 to 17 grams of water per gram of coffee. For a single 12-ounce cup, start with 20 grams of coffee and 300 grams of water. Pour-over and auto-drip sit around 1:16, while immersion methods like French press often taste better closer to 1:15. Adjust by taste: sour means add coffee, bitter means add water.
Does grind size really matter for specialty coffee?
Grind size controls how fast water pulls flavor from the grounds. Too coarse and you get under-extraction: thin body, sour notes, weak finish. Too fine and you hit over-extraction: harsh, bitter, drying. A burr grinder gives consistent particles, which is why it matters more than a fancy brewer. Match grind to method: coarse for French press, medium for auto-drip, medium-fine for pour-over, fine for Aeropress and moka pot.
What water temperature should I use for specialty coffee?
The Specialty Coffee Association recommends 195 to 205 degrees Fahrenheit, roughly 30 to 45 seconds off a full boil. Darker roasts extract faster, so aim lower, around 195 to 200. Lighter roasts need the higher end, 200 to 205, to pull out sweetness and acidity. If you have no thermometer, boil water and let it sit for 30 to 45 seconds before pouring.
What is the 4-6 method for brewing coffee?
The 4-6 method, popularized by Tetsu Kasuya, splits a pour-over into five pours after the bloom. The first two pours set sweetness and acidity, and the last three control strength. You adjust the ratio between the two pairs to change flavor balance. It works best with a medium-coarse grind, a gooseneck kettle, and a scale, and it rewards brewers who want control over body and clarity.